Sanity is such a great CMS for creating and managing your content. If you started using Sanity in the V3 era, most of the guides you will find online will be specific to v2, and some of the code snippets will not straight out work. Had a similar challenge trying to use YouTube and code blocks in the v3.
In this guide; we will be creating a Sanity V3 schema for YouTube and code blocks and rendering them on a React frontend.
This guide assumes that you’re familiar with setting up Sanity in your react project and creating basic schemas. Don’t worry if you’re new to Sanity, it is easy to learn. This is a good tutorial to help get you started.
YouTube Schema
The YouTube Schema will be an input field that we will use to store the URL of the video we want to embed. So in this case, our schema will be an object type with a URL field.
// youtube.js

import {defineField, defineType} from 'sanity'

export default defineType({
  name: 'youtube',
  type: 'object',
  title: 'YouTube Embed',
  fields: [
    defineField({
      name: 'url',
      type: 'url',
      title: 'YouTube video URL',
    }),
  ],
})
The next step is to import the youtube.js file into the schemas/index.js to make it available as a type: 'youtube':
// schemas/index.js

import blockContent from './blockContent'
import category from './category'
import post from './post'
import author from './author'
import youtube from './youtube'

export const schemaTypes = [post, author, category, blockContent, youtube]
Now we can include this field in our blockcontent.
// blockcontent.js

export default defineType({
  title: 'Block Content',
  name: 'blockContent',
  type: 'array',
  of: [
    defineArrayMember({
      type: 'youtube',
      title: 'YouTube Embed',
    }),
  ],
})
Now from the body (blockcontent) toolbar in the editor, you can choose a YouTube block, then paste in the URL of the video.

Code Block Schema:
The code block is slightly different as Sanity has an official plugin that you use to insert code blocks into your schema. So here we’re just installing the plugin, adding it to our config.js file, and then our blockcontent schema.
Run this command to install the code-input plugin
npm install @sanity/code-input
Afterward, add it as a plugin in your sanity.config.js (or .ts):
import {codeInput} from '@sanity/code-input'

export default defineConfig({
  // ...
  plugins: [codeInput()],
})
Now we can include this field in our blockcontent. We also have the option to define the theme, and languages we want for the code block.
// blockcontent.js

export default defineType({
  title: 'Block Content',
  name: 'blockContent',
  type: 'array',
  of: [
    defineArrayMember({
      name: 'code',
      title: 'Code',
      type: 'code',
      options: {
        theme: 'github',
        darkTheme: 'terminal',
        language: 'js',
        languageAlternatives: [
          {title: 'Javascript', value: 'js'},
          {title: 'HTML', value: 'html'},
          {title: 'CSS', value: 'css'},
        ],
      },
    }),
    defineArrayMember({
      type: 'youtube',
      title: 'YouTube Embed',
    }),
  ],
})
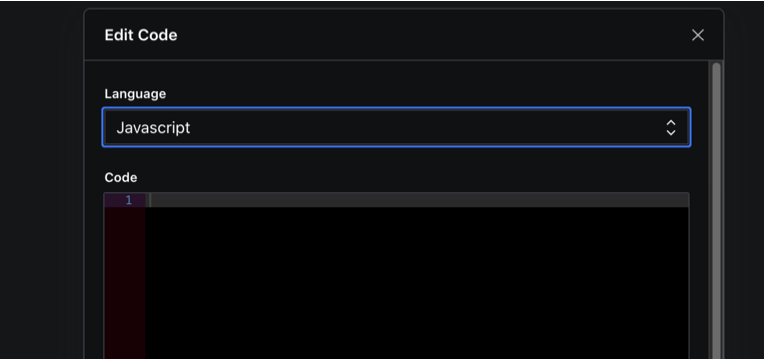
Now from the body (blockcontent) toolbar in the editor, you can choose a code block, select the language and paste it into your code.

Render the raw data in your react frontend:
The next step would be to render the raw data on your frontend. When you’re querying your data from sanity it is returned as a portable text, so what this means is that you’re getting raw JSON data without any formatting. For example: when you’re using a typical CMS, your data gets returned as rich text or HTML but with Sanity, you’re getting raw JSON data. Sanity has a react component (Portable text) that you use to render this portable text data on your frontend.
To get started:
Run this command to install the portabletext component:
npm install --save @portabletext/react
Remember that the raw data that we’re passing in does not have any format(style) - it is just raw JSON data. So we will use the value attribute to pass the data into the Portabletext component, and then use the custom components to pass in the format (style) we want for the data
import {PortableText} from '@portabletext/react'

<PortableText
  value={[/* array of portable text blocks */]}
  components={/* optional object of custom components to use */}
/>
For the YouTube Block
Remember the YouTube URL we saved? Well, Sanity is going to return it to us as just JSON. So we need a way to take the URL and turn it into an embedded video. Luckily for us, there is a react component (LiteYouTubeEmbed) that takes the ID of a YouTube video and renders the video on your react frontend. So all we have to do is figure out how to extract the youtube ID from the youtube URL we stored in our backend. To get the ID we will use the get-youtube-id package to extract the ID from the URL and pass it into the LiteYouTubeEmbed component.
For the Code Block
The same process as above but here will be using the Refractor component to render the code data type in our frontend.
So this is what our final component should look like - we have defined a format for all youtube and code data types that will use when rendering on the frontend.
import React from 'react'
import getYouTubeId from 'get-youtube-id'
import LiteYouTubeEmbed from 'react-lite-youtube-embed'
import 'react-lite-youtube-embed/dist/LiteYouTubeEmbed.css'
import {PortableText} from '@portabletext/react'

import Refractor from "react-refractor";
Refractor.registerLanguage(js);

const components = {
  types: {
    youtube: (props) => {
      const id = getYouTubeId(props.value.url);
      return <LiteYouTubeEmbed id={id} />;
    },
    code: (props) => (
          <Refractor
            language={props.value.language}
            value={props.value.code}
            markers={props.value.highlightedLines}
          />
    ),
  },
}
Now we can pass the raw data into the Portabletext component using the value attribute and the components.
export default const Body = () => {
  return (
    <PortableText value={Data} components={components} />
  )
}
That’s it! We should be able to see our code blocks and youtube videos on the frontend.
